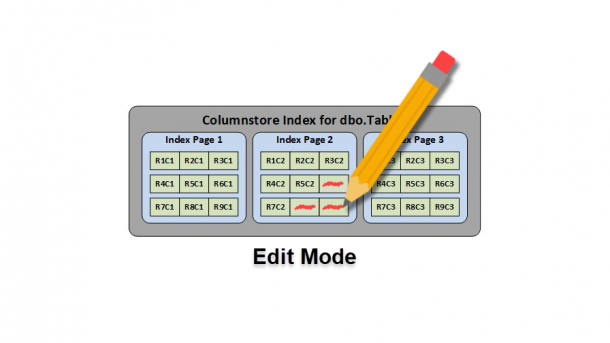
As I’ve discussed in some of my previous posts, creating a non-clustered Columnstore index will make the index as well as the base table read-only. Which means you can’t insert, update, or delete any data until your drop the index. This may seem like a huge issue, but in reality it’s not that much of a problem. Keep in mind the Columnstore index feature is targeted at data warehouses that modify data infrequently. In the examples below, I go through two methods you can use to edit your read-only data.
To get started, we need to create a test table and insert a few rows.
USE master;
GO
CREATE DATABASE TEST;
GO
USE TEST;
GO
CREATE TABLE dbo.Table1
(
col1 INT
,col2 VARCHAR(20)
);
GO
INSERT INTO dbo.Table1 (col1, col2) VALUES (1, 'Test Value 1');
INSERT INTO dbo.Table1 (col1, col2) VALUES (2, 'Test Value 2');
INSERT INTO dbo.Table1 (col1, col2) VALUES (3, 'Test Value 3');
INSERT INTO dbo.Table1 (col1, col2) VALUES (4, 'Test Value 4');
INSERT INTO dbo.Table1 (col1, col2) VALUES (5, 'Test Value 5');
INSERT INTO dbo.Table1 (col1, col2) VALUES (6, 'Test Value 6');
INSERT INTO dbo.Table1 (col1, col2) VALUES (7, 'Test Value 7');
INSERT INTO dbo.Table1 (col1, col2) VALUES (8, 'Test Value 8');
INSERT INTO dbo.Table1 (col1, col2) VALUES (9, 'Test Value 9');
GO
Next, we’ll add a non-clustered Columnstore index to the table.
CREATE NONCLUSTERED COLUMNSTORE INDEX nci_Table1
ON dbo.Table1(col1,col2);
GO
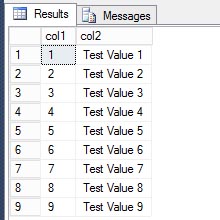
At this point, we have effectively made this table read-only. We can read from it all day long, but if we attempt to update a value, we will get an error.
SELECT * FROM dbo.Table1;
GO
UPDATE dbo.Table1 SET col2 = 'changed a value' WHERE col1 = 1;
GO
Msg 35330, Level 15, State 1, Line 41 UPDATE statement failed because data cannot be updated in a table that has a nonclustered columnstore index. Consider disabling the columnstore index before issuing the UPDATE statement, and then rebuilding the columnstore index after UPDATE has completed.
Once again, I love Microsoft’s error message. It gives you very good information on one method to use for changing data in a non-clustered Columnstore index.
Disabling the non-clustered Columnstore index gives you the ability to make changes to the data; however, it can’t be used for any queries while it’s disabled. I like to wrap all the commands into a single transaction using the XACT_ABORT option. This guarantees that any error will rollback the entire set and not just one single statement.
SET XACT_ABORT ON;
GO
BEGIN TRANSACTION;
GO
ALTER INDEX nci_Table1 ON dbo.Table1 DISABLE;
GO
UPDATE Table1 SET col2 = 'changed a value' WHERE col1 = 1;
GO
ALTER INDEX nci_Table1 ON dbo.Table1 REBUILD;
GO
COMMIT TRANSACTION;
GO
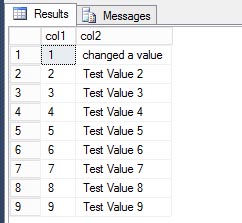
Looking at the table again, we can see the first row was definitely changed.
SELECT * FROM dbo.Table1;
GO
This is probably the easiest method to change your data; however, it’s also the most resource intensive. SQL Server will need to rebuild the index for the entire table not just for that one row that we changed. So if your table has millions or even billions of rows, it could take a lot time to rebuild and utilize a lot of resources. This is probably something you don’t want to do in the middle of your business day.
The second method we’ll cover, involves using partition switching. First, we’ll create the same table but partition it into 3 parts.
USE TEST
GO
CREATE PARTITION FUNCTION myRangePF1 (INT)
AS RANGE LEFT FOR VALUES (3,6);
GO
CREATE PARTITION SCHEME myRangePS1
AS PARTITION myRangePF1
ALL TO ([PRIMARY]);
GO
CREATE TABLE dbo.PartitionedTable (col1 INT, col2 VARCHAR(20))
ON myRangePS1 (col1);
GO
INSERT INTO dbo.PartitionedTable (col1, col2) VALUES (1, 'Test Value 1');
INSERT INTO dbo.PartitionedTable (col1, col2) VALUES (2, 'Test Value 2');
INSERT INTO dbo.PartitionedTable (col1, col2) VALUES (3, 'Test Value 3');
INSERT INTO dbo.PartitionedTable (col1, col2) VALUES (4, 'Test Value 4');
INSERT INTO dbo.PartitionedTable (col1, col2) VALUES (5, 'Test Value 5');
INSERT INTO dbo.PartitionedTable (col1, col2) VALUES (6, 'Test Value 6');
INSERT INTO dbo.PartitionedTable (col1, col2) VALUES (7, 'Test Value 7');
INSERT INTO dbo.PartitionedTable (col1, col2) VALUES (8, 'Test Value 8');
INSERT INTO dbo.PartitionedTable (col1, col2) VALUES (9, 'Test Value 9');
GO
CREATE NONCLUSTERED COLUMNSTORE INDEX nci_PartitionedTable
ON dbo.PartitionedTable(col1,col2);
GO
SELECT * FROM dbo.ParitionedTable;
GO
This table has the same data as before, but internally it’s partitioned. Using sys.partitions to get the details, you can see there are a total of 3 partitions, each with 3 rows.
SELECT
SCHEMA_NAME(t.schema_id) AS SchemaName
,OBJECT_NAME(i.object_id) AS ObjectName
,p.partition_number AS PartitionNumber
,fg.name AS FilegroupName
,rows AS 'Rows'
,au.total_pages AS 'TotalDataPages'
,CASE boundary_value_on_right
WHEN 1 THEN 'less than'
ELSE 'less than or equal to'
END AS 'Comparison'
,value AS 'ComparisonValue'
,p.data_compression_desc AS 'DataCompression'
,p.partition_id
FROM sys.partitions p
JOIN sys.indexes i ON p.object_id = i.object_id AND p.index_id = i.index_id
JOIN sys.partition_schemes ps ON ps.data_space_id = i.data_space_id
JOIN sys.partition_functions f ON f.function_id = ps.function_id
LEFT JOIN sys.partition_range_values rv ON f.function_id = rv.function_id AND p.partition_number = rv.boundary_id
JOIN sys.destination_data_spaces dds ON dds.partition_scheme_id = ps.data_space_id AND dds.destination_id = p.partition_number
JOIN sys.filegroups fg ON dds.data_space_id = fg.data_space_id
JOIN (SELECT container_id, sum(total_pages) as total_pages
FROM sys.allocation_units
GROUP BY container_id) AS au ON au.container_id = p.partition_id
JOIN sys.tables t ON p.object_id = t.object_id
WHERE i.index_id < 2
ORDER BY ObjectName,p.partition_number;
GO
To use partition switching, you have to create a non-partitioned table that matches your partitioned table in every way; including all the indexes and constraints. For this example, we need to edit row 1 that resides in the first partition, so we need to create a non-partitioned table that has a constraint that mimics the first partition; col1 <= 3.
CREATE TABLE dbo.NonPartitionedTable ( col1 INT CHECK (col1 &lt;= 3) ,col2 VARCHAR(20) ); GO CREATE NONCLUSTERED COLUMNSTORE INDEX nci_NonPartitionedTable ON dbo.NonPartitionedTable(col1,col2); GO
Once we have the table created, we can perform the switch.
SET XACT_ABORT ON;
GO
BEGIN TRANSACTION;
GO
ALTER TABLE dbo.PartitionedTable SWITCH PARTITION 1 TO dbo.NonPartitionedTable;
GO
ALTER INDEX nci_NonPartitionedTable ON dbo.NonPartitionedTable DISABLE;
GO
UPDATE NonPartitionedTable SET col2 = 'changed a value' WHERE col1 = 2;
GO
ALTER INDEX nci_NonPartitionedTable ON dbo.NonPartitionedTable REBUILD;
GO
ALTER TABLE dbo.NonPartitionedTable SWITCH TO dbo.PartitionedTable PARTITION 1;
GO
COMMIT TRANSACTION;
GO
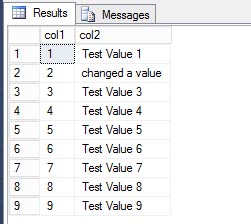
Finally, all we have to do is just switch that data back into the partitioned table.
SELECT * FROM dbo.ParitionedTable;
GO
I know this may look exactly like what we did in the first method, and it is. However, by having our initial table partitioned, it gives us the ability to only rebuild the non-clustered Columnstore index on smaller subset of data instead of the entire table. If this partitioned table had millions of rows, then that ALTER INDEX REBUILD command might only need to run against a fraction of those rows and therefore complete much quicker and utilize far fewer resources. Not only can both of these methods can be used to edit existing data in a table that has a non-clustered Columnstore index, but they can also be used to insert or delete rows.
On a final note, I will recommend that you always partition any table that has a Columnstore index. This feature is designed for very large tables, and having it partitioned gives you much more flexibility than if it’s not. And not just for working with Columnstore indexes, but other tasks as well.
You can read more about Columnstore indexes and partition switching from Books Online.

