The 64Kb Allocation Unit size is one of the easiest SQL Server best practice items to complete during your new builds, but from time to time, I still see this one overlooked. And I know this topic has been beat to death over the years, so we are not going to cover the why you should format volumes using 64Kb Allocation Size. We are just going to cover how to check the current value.
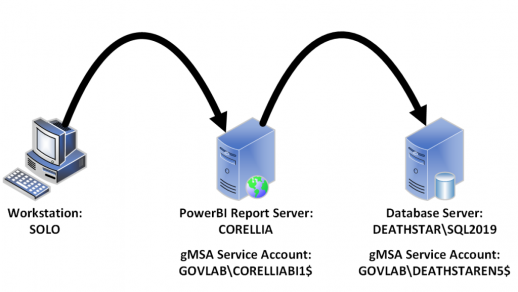
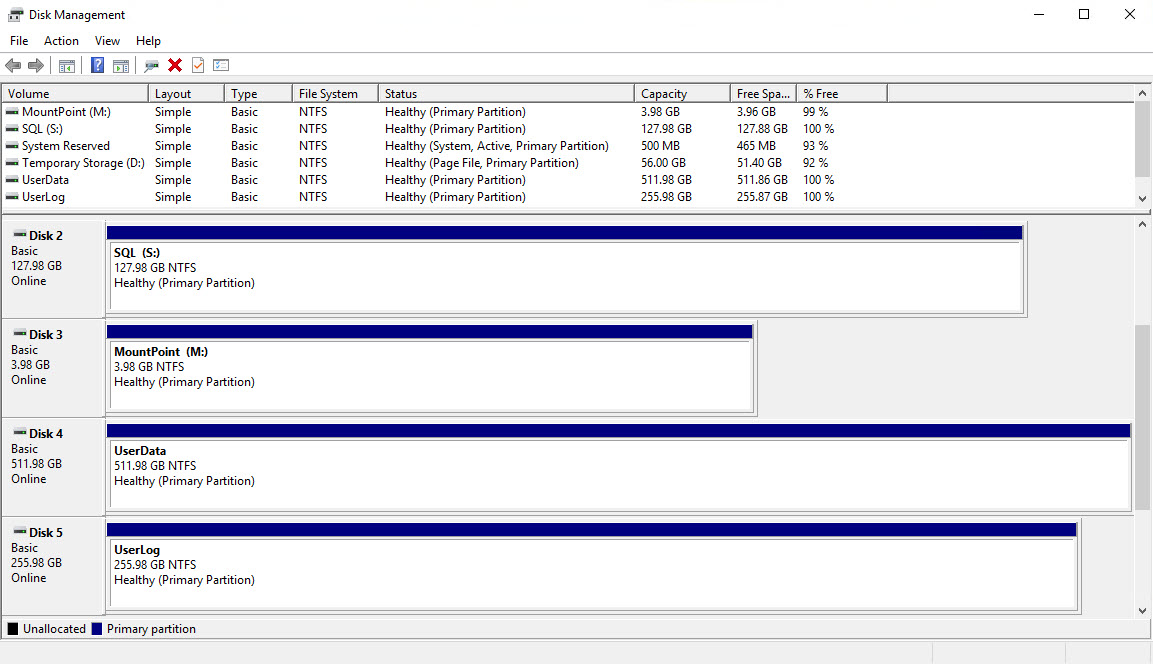
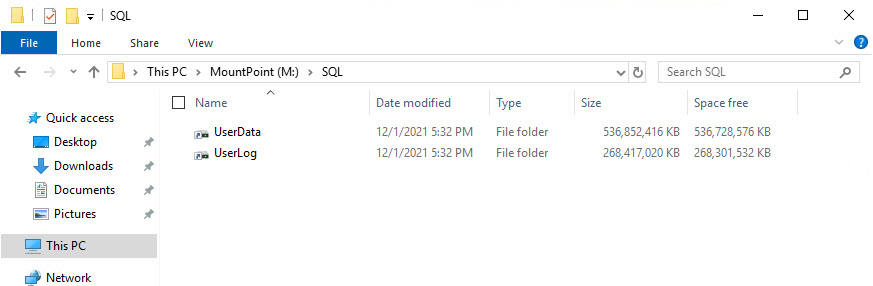
In our setup, we have a server with 4 disks attached; two are mounted with drive letters (M: and S:) and two are mounted as folders (a.k.a. mount point) under one of those drive letters.
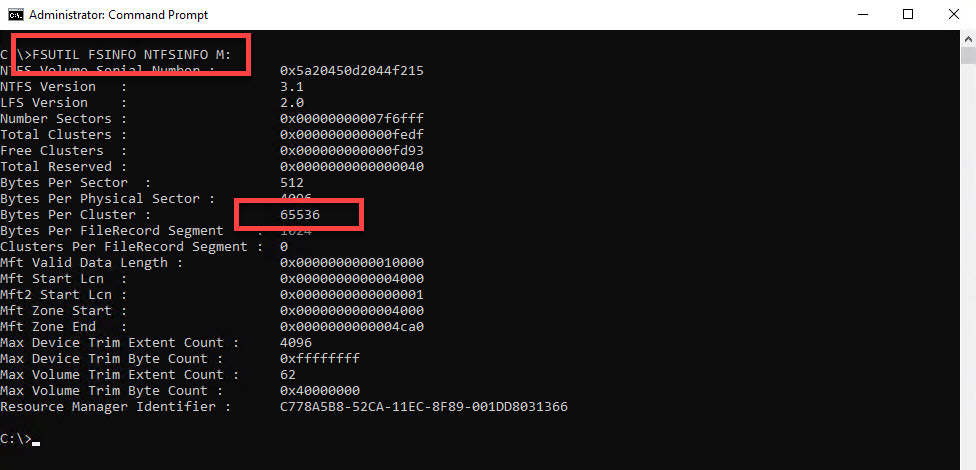
The usual way to check the Allocation Unit size it to use FSUTIL from a command prompt and specify the drive letter you want to check.
However, for mount points there is no drive letter. For that, we need to get the underlying volume name. We can use FSUTIL again to get the name of those mounted volumes.
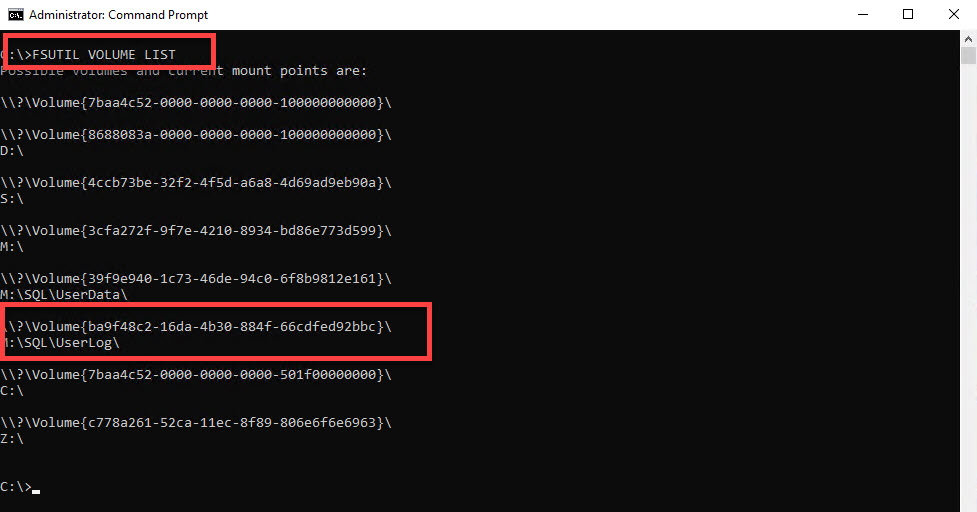
Once we have the volume name, we use the same command but instead of a drive letter we give the volume name in quotes, but make sure you leave off the trailing backslash.
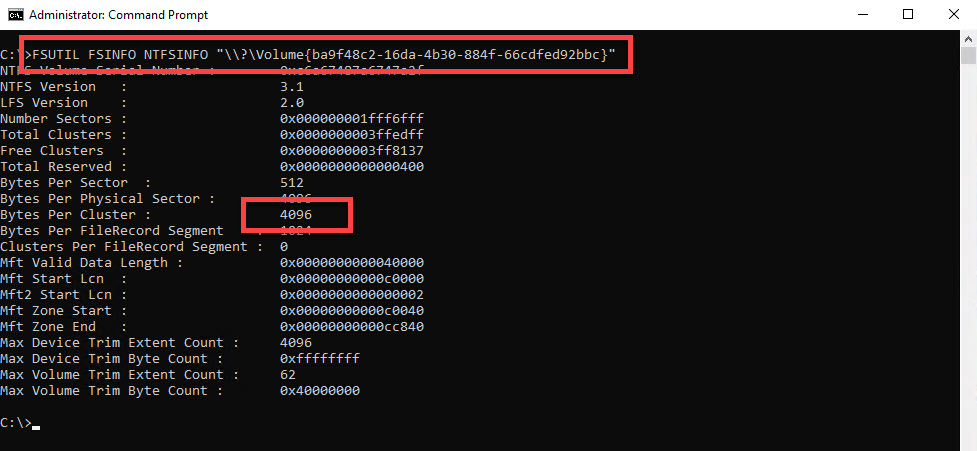
From there you can see the Bytes Per Cluster value, which should be 65536. If any other value is returned, then you will need to reformat that volume.
An alternative to using FSUTIL is PowerShell. We can get the same details for each volume without having to run multiple commands and we can format the output to make it easier to read.
We will need to query the WMI object, Win32_Volume, to get the disk details, but we can also filter out other drives that we do not care about. For example, a DriveType value of 3 only returns locally attached disks, we filter out drive letters C and D, and volumes with names that begin with “\\”.
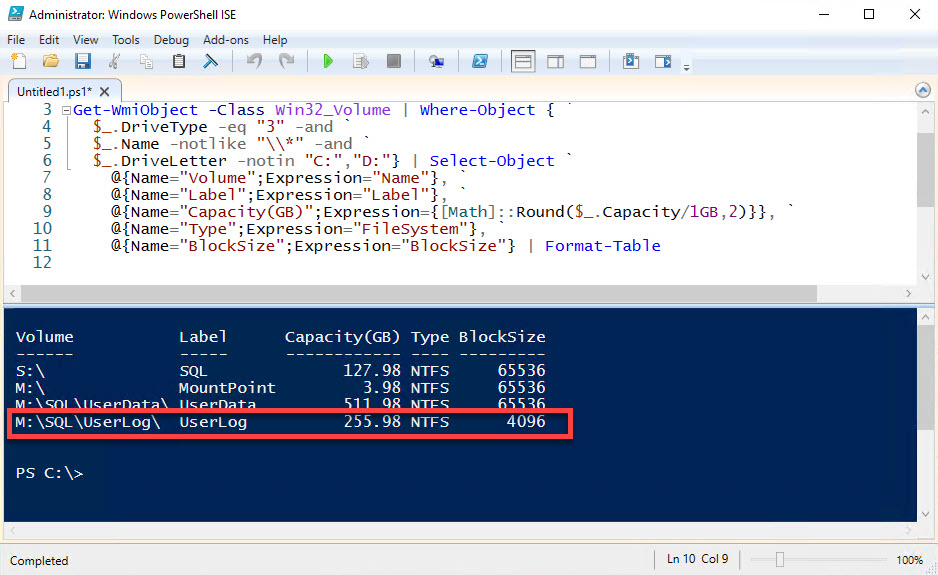
As you can see, the output is much easier to read. There are no special steps needed to figure out which mount point may be a problem; it just displays the full path to that location. We can clearly see that one of the mount points is formatted using the default Allocation Unit size of 4K. From here we can easily reformat that volume using 64Kb and then continue with the SQL Server installation.
The full code is below.
Get-WmiObject -Class Win32_Volume | Where-Object { `
    $_.DriveType -eq "3" -and `
    $_.Name -notlike "\\*" -and `
    $_.DriveLetter -notin "C:","D:"} | Select-Object `
        @{Name="Volume";Expression="Name"}, `
        @{Name="Label";Expression="Label"}, `
        @{Name="Capacity(GB)";Expression={[Math]::Round($_.Capacity/1GB,2)}}, `
        @{Name="Type";Expression="FileSystem"}, `
        @{Name="BlockSize";Expression="BlockSize"} | Format-Table